

Migrating from VMware to ProxMox
This is a longer post so here is a Table of Contents
Migration Attempt #Two
So this is my second attempt to migrate away from VMware’s platform. This one went better then last time, though there were some causalities along the way. Namely all my Windows VMs.
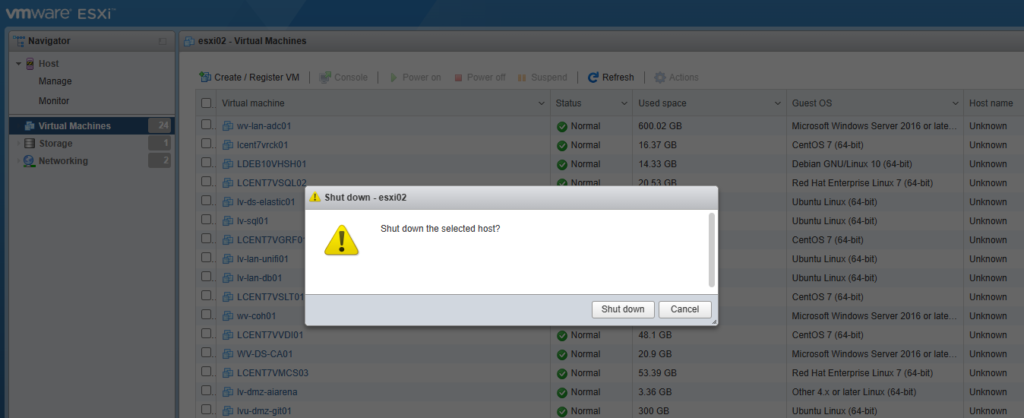
The reason for the migration has not changed, VMware is dropping/has dropped support for older hardware. This was the main reason behind the migration, but this way I can save $200 a year on licensing as well. I have also learned a lot about linux bridging by doing this so I think it is a worthwhile endeavor. There are good reasons for using and learning VMware, it is still an industry standard for self-hosted clouds. But I don’t need to use it any more. A lot of other virtualization software is out there now, when I started using ESXi back on version 3.5 there were not a lot of options. For this round of migration attempts I selected ProxMox as it has all the features I am looking for in a virtualization system and then some. The one other thing that pushed me to do this work was that one of my ESXi hosts died from a power failure. The server was fine but the file on its internal USB drive got corrupted, rather then trying to reinstall I figured it was a good time to migrate. So let’s get to work.
Prep work
I did basically none of this. Which is why I ran into a few issues and possibly why I lost a few VMs during the migration (6 VMs were harmed in the making of this Migration (out of 24)). Now that being said I still have all the VMs backed up and I can recover the lost 6, but that can be a part two. Also always validate your backups! I have lost 30+ VMs from not validating a backup.
The only thing I really did as prep work was install ProxMox on my failed ESXi host and setup a dataset on my TrueNAS server to house the new files.
Formatting
The easiest way I found after a quick google search was to just download the VMDKs (the virtual hard drive) and create a new VM on ProxMox then convert the file and attach the converted image to the newly created VM. But that was a lot of clicking…
So I decided to use the OVF format, but that requires a lot of clicking in the GUI too so I did it the laziest possible way. I scripted it. I found VMware’s OVFtool. Using this I could connect to my ESXi host and download the VMs from the command line so I wrote 3 quick PowerShell scripts to do just this. They are available on my github here I tried to make them easy to adapt, but I was throwing this together as I went rather quickly.
Script One: Gets the list of available VMs. i.e. the ones that are registered.
Script Two: Downloads and converts the VMs to OVFs
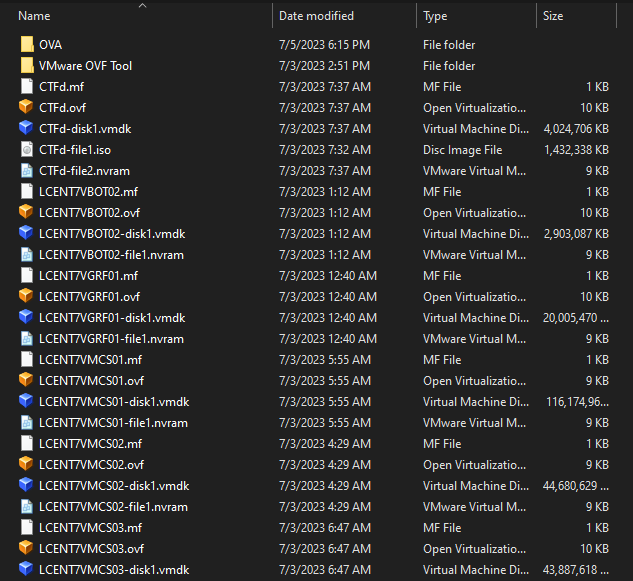
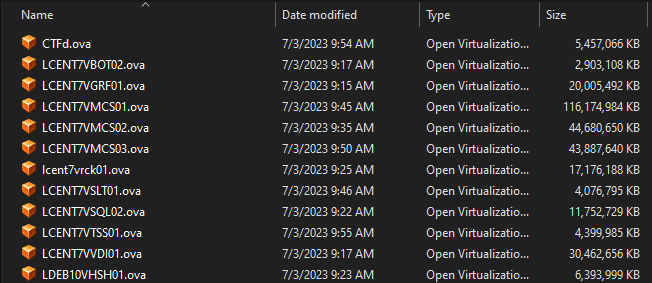
But this format was a problem for me. It was messy there were multiple files for each VM. It didn’t need to be this way. So I wrote Script Three: Convert files to OVAs. Note: you will need at least double the storage free that your VM’s actually take up in order to convert to OVAs. Or modify the script to delete OVFs as you go
The Transfer
Once I had the OVAs, I just SCPed the files over to the server’s NFS share that it uses for storing the VMs. I used Bitvise’s SSH Client for this because in this case it is more robust to have a GUI. Because it can pause, stop and start, or restart the transfer with a single click.
Importing
Here I wrote another script to extract the OVF and VMDK files, Convert the disk to a new format and then import it into the system. I did some quick research on formats and the short of it is use qcow2 or raw for the image formats. Use qcow2 if your under-laying file system does not support snapshots and you want that feature, or you don’t want to deal with filesystem snapshots. And use raw if the snapshots can be handled by your file system. Note: there is a storage cost penalty for using qcow2 and file system snapshots.
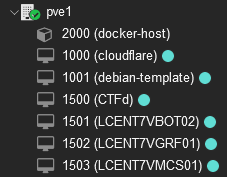
I am going to break a few things down in the script just for clarification. The vmid is what ProxMox uses to differentiate VMs from one another the important part hear is that these must always be unique for any VM or Container (CT) you run on your ProxMox server/cluster. The number is arbitrary, just must be unique. I like setting up schemes for mine. As an example, all my VMs are in the 1000 space and all my Containers are in the 2000 space. In the script set your vmid how you would like making sure there are no collisions that happen.
There are two more variables I need to tell you about with this script. ovafolder and workingfolder
ovafolder needs to be set to the folder with your OVA files in them.workingfolder needs to be a temp folder of some sort with enough storage for a second copy of all your data.
Also always read through and understand the scripts you are running from the internet.
Once you do run the script that totally won’t delete your entire file system,😉, all the VMs should be imported now. And now, now is when we get to the part that has to be done manually because we didn’t prepare, but we have made it this far too late to start over now, right?
Restoring the VMs to working order
So an few things have happened through this process that you may not be aware of, or you are and you ran into issues and hence you are here. See because we have changed the underlying virtual hardware. VMware emulated a certain configuration and ProxMox has a different emulated configuration. These changes can cause issues, it comes down to not having the proper drives in Linux or Windows so the systems don’t start properly. That being said I did have a few VMs start fine, most needed some help though. Also none of them kept their NICs so had to add that to all of them.
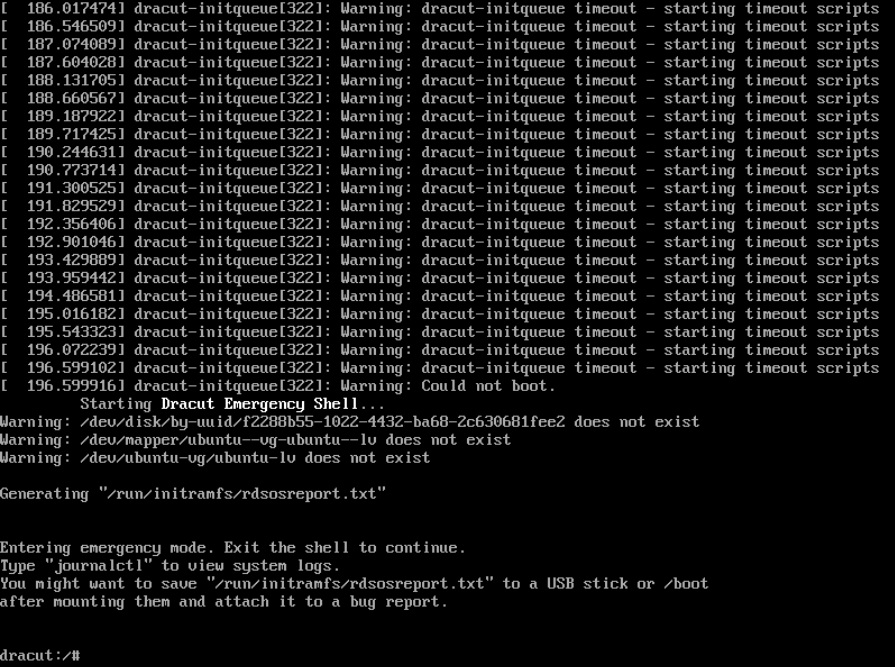
The dreaded dracut prompt
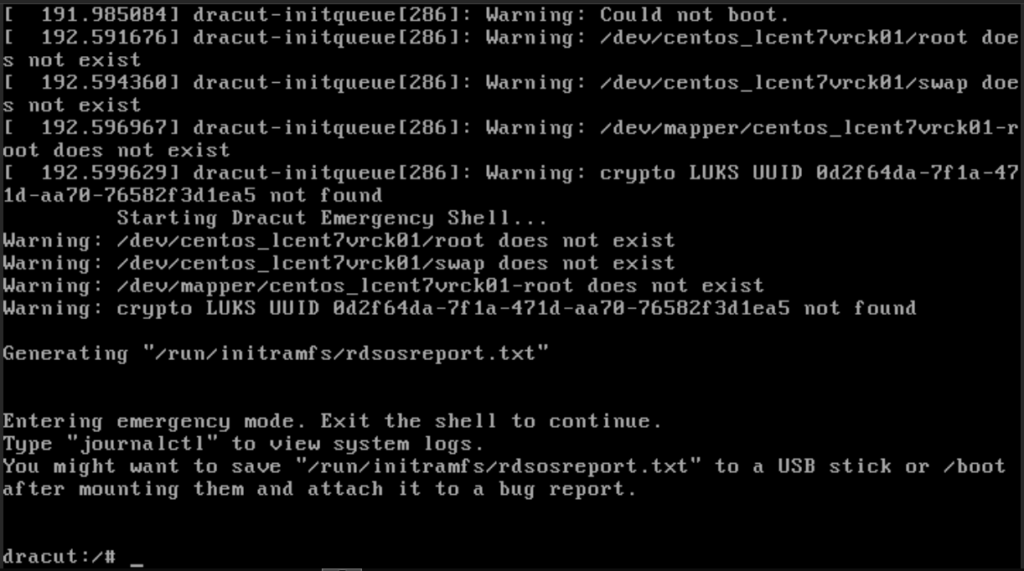
Searching for the disks in dracut
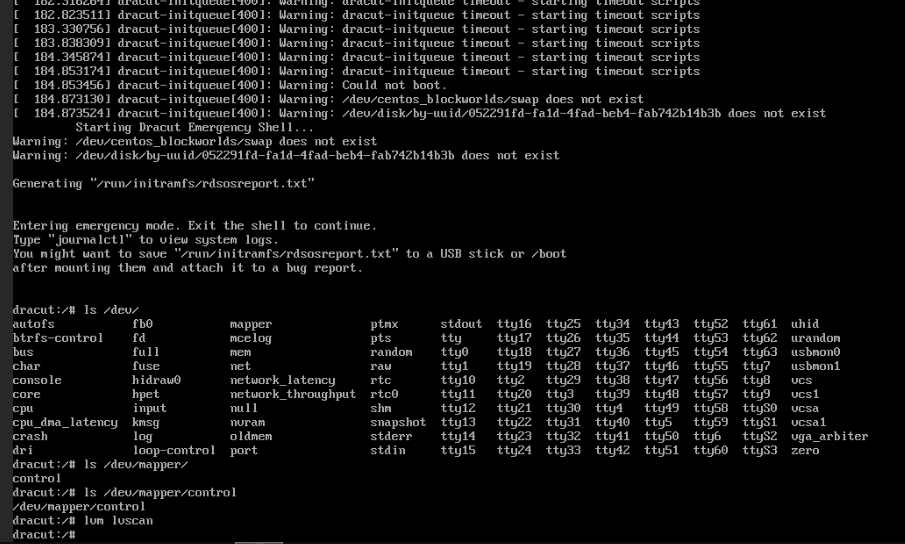
So I run a mixture of CentOS, Ubuntu, Fedora, and Debian. Recovering CentOS and Fedora was pretty easy and straightforward. So here’s what I did from dracut. First I looked around and tried to locate the drives/disk/partitions with no luck. This told me that the driver that initramfs had loaded could not see the drive. So I powered off the machine and went to look at what virtualized hardware I could emulate.
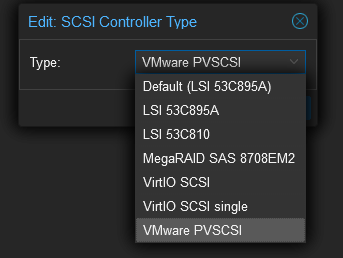
Looking through the options there is an option for VMware SCSI emulation. Since VMware is what I am migrating from it should work. Or at least get me closer to a working image.
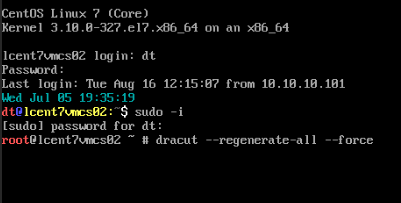
But selecting the right virtual hardware was not enough. Because it was apparently different enough that I still had to boot to recovery mode. Luckily for me most of my systems are CentOS Seven. Or not so lucky if you consider what Red Hat just did to the Open Source community. But I am getting off topic. CentOS by default has a recovery mode that it can boot to.
This worked very well for fixing the VM. It booted into recovery mode, just fine I logged in became sudo and was able to run dracut --regenerate-all --force
After about ten minutes it finished with no additional output. I was able to reboot the machine and it booted without any further issues. There was additional work that needed to be done mainly regarding fixing the network devices but more on that later. Next it was Debian’s turn, it too had a recovery mode and I was able to boot up run the same commands reboot and it worked, however; it’s dracut was a lot more talkative, lots of output, scrolled for about ten minutes and then was good. But one of my Ubuntu machines didn’t care for it. Recover mode failed to find disks, repeatedly so I had to live boot an ISO. Then I mounted it’s file system and ran the regenerate command, rebooted and it failed. I kept getting a dracut-initqueue timeout error. Then after a few minutes it would drop to the dracut terminal.
So I booted the live ISO and did it again, maybe I missed something. Or maybe it didn’t work the first time for some reason? I ran the same commands shown below, as root, to mount the VM’s hard drive and try to repair it again:
for i in proc sys dev; do mount --rbind /$i /mnt/$i ; done
chroot /mnt/rescue
mount -a
dracut --regenerate-all --force
sync
reboot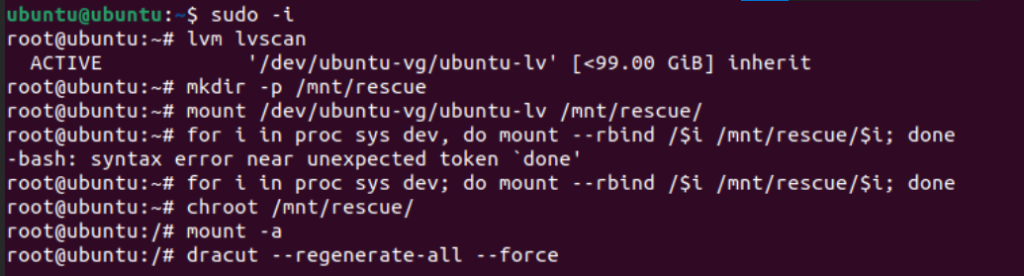
Now both times I saw a number of errors pop up after running the dracut command but it seemed like it finished okay. Rebooted again, same issue. So I came up with a new plan. I mounted the system same as last time, but instead of running dracut myself, I just ran updates. Which, when finished patching as the final step it ran dracut to build the boot folder and initramfs.
for i in proc sys dev; do mount --rbind /$i /mnt/$i ; done
chroot /mnt/rescue
mount -a
apt update
apt upgrade -y
reboot
And it worked! Something about how I called dracut to build initramfs and how it did was different. I suspect it might have been updates to grub, but I am not sure.
Networking
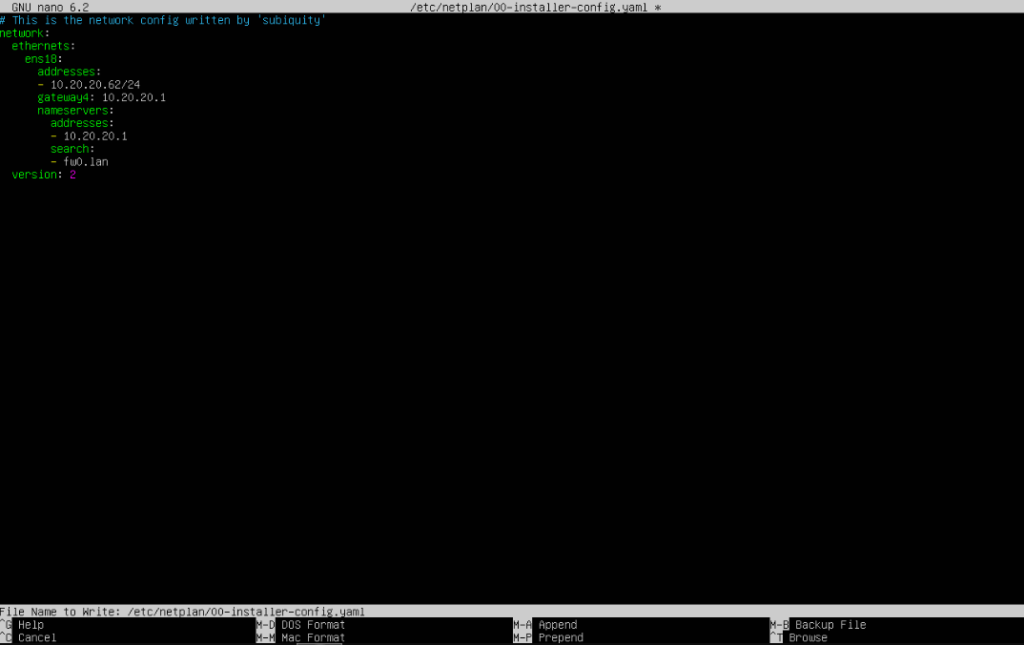
As the final step to get each VM working I had to add Network Interface Cards (NICs) to each VM. This was easy enough, but the configs for static IPs was not properly associated with the new NIC so here is a quick run through on one of my VMs. For the Ubuntu OS I used netplan. There is a file is the folder /etc/netplan that is a YAML below is a screenshot of setting a static IP on the server. One thing you can’t see is the old name of the NIC was ens160 the new name is ens18 so all I did was change the ethernet device name, save the file, then ran sudo netplan apply
Success?
So I got most of the VMs moved over successfully (~75%) But 6 were DOA when they got to the new server. They got into a boot loop like the VM couldn’t find hard drive image to boot from so it was just failing to boot and resetting itself every few seconds. This happened with 3 Linux systems and my only 3 Windows server. So I am not sure what the common thread here was.
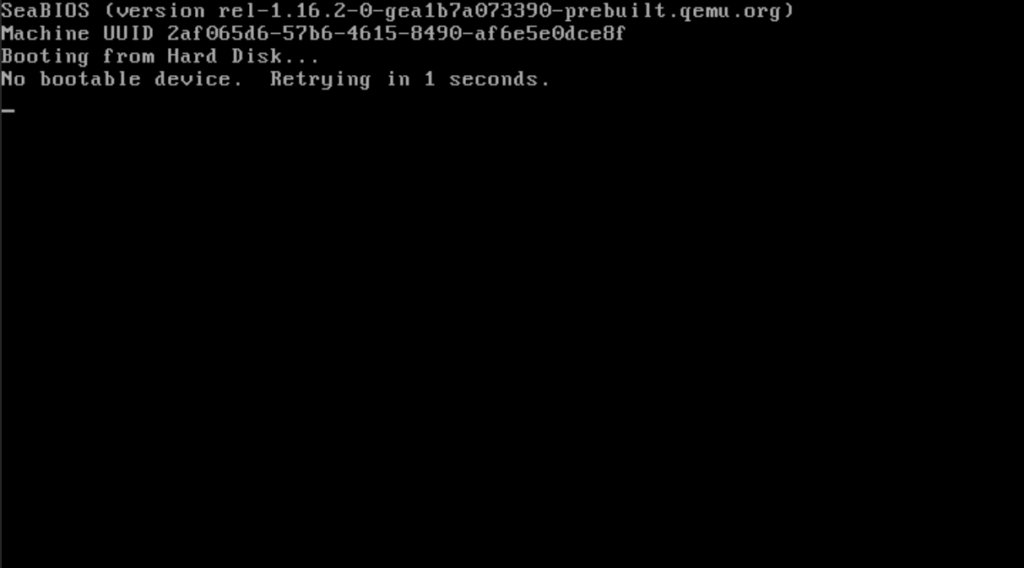
I tried changing the BIOS to UEFI but had no luck, I tried changing the virtual disk hardware and still no luck. I tried a number of other things but none of them worked. I am planning on booting those devices up on something like VMware workstation to see if I can salvage them or worst case if I really feel like making the effort reinstall ESXi on a server and remount the datastore to see if there is any prep work I can do to make the move actually work. If I do that I will follow this up with another entry. And that worst case, yeah, after getting everything up and running I wanted to cluster my servers so I wiped the other 2 servers running ESXi and set them up with ProxMox. Once I learned the new interface and understood how it was running under the hood (Debian 12) it because much easier to manage. The way I learned the interface was with some youtube tutorials from a channel called “Learn Linux TV” Here is the first episode of series. I found it very useful though it was a little slow for my pace so I listen on 1.5x speed.
Conclusion
I have been using ProxMox for about two weeks now and I am very happy with it. I love the container templates, though I want to learn to add more then what is given by default. I pushed my knowledge of Linux networking a bit more as well as learning to deal with the initramfs. Most of the problems I ran into I had to google how to fix them. It was a great learning experience and I had a lot of fun along the way.
Before this switch I was very wary of ProxMox, now that I am using it, I am not sure why I didn’t switch sooner. I would highly recommend ProxMox to anyone else either looking to switch virtualization platforms or to start working with virtualization in general. For now I am just setting up more servers and continuing to learn and grow my computer skills.